
Admissions
Every student who joins through the application portal — rather than being migrated in from an existing roll — moves through the same six-state lifecycle: pending, sent back for more information, approved, accepted, rejected, or withdrawn. This guide starts with opening the window applications arrive through, then applying, then reviewing what comes in.
Screens below are from a demo school with real submitted applications. The Guardian and Applied-by columns are removed — beyond a name, they identify exactly who applied for which child.
Who can do what
Deciding an application is narrower than reading the intake — every officer including the Burser can see every application (fees start here, so the Burser is included where they normally wouldn't be), but only the Head Teacher can act on one, or open the window it arrived through.
Opening an admission window
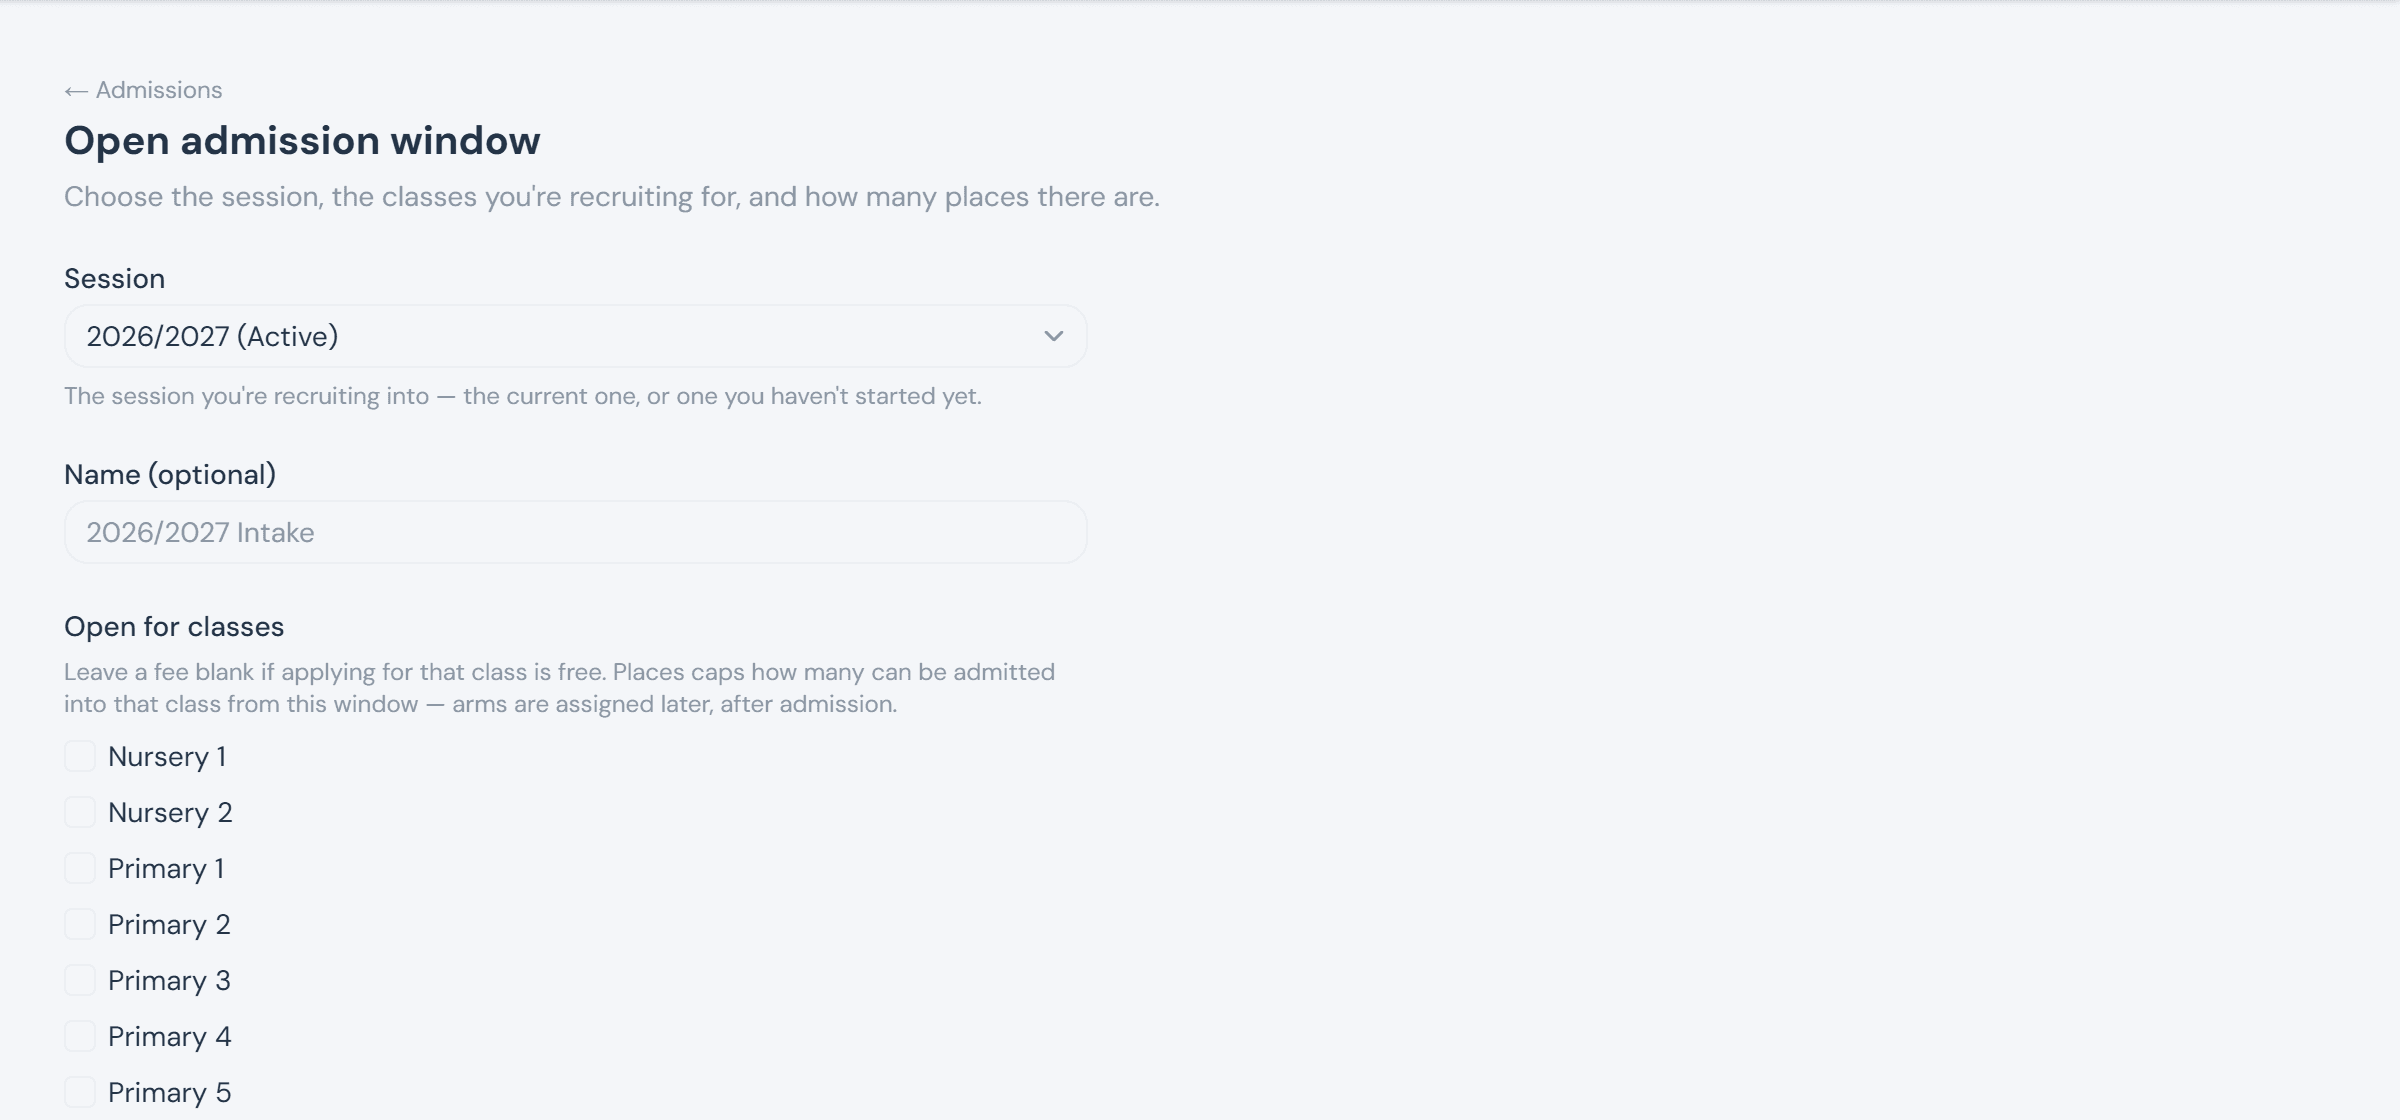
Nothing can be applied for until the Head Teacher opens a window: a session, one or more classes with an optional fee and a places cap per class, plus the documents applicants are told to bring or download. At most one window is open per session — closing one frees that session up for another later, and approving an application that fills a class's last place closes the window automatically.
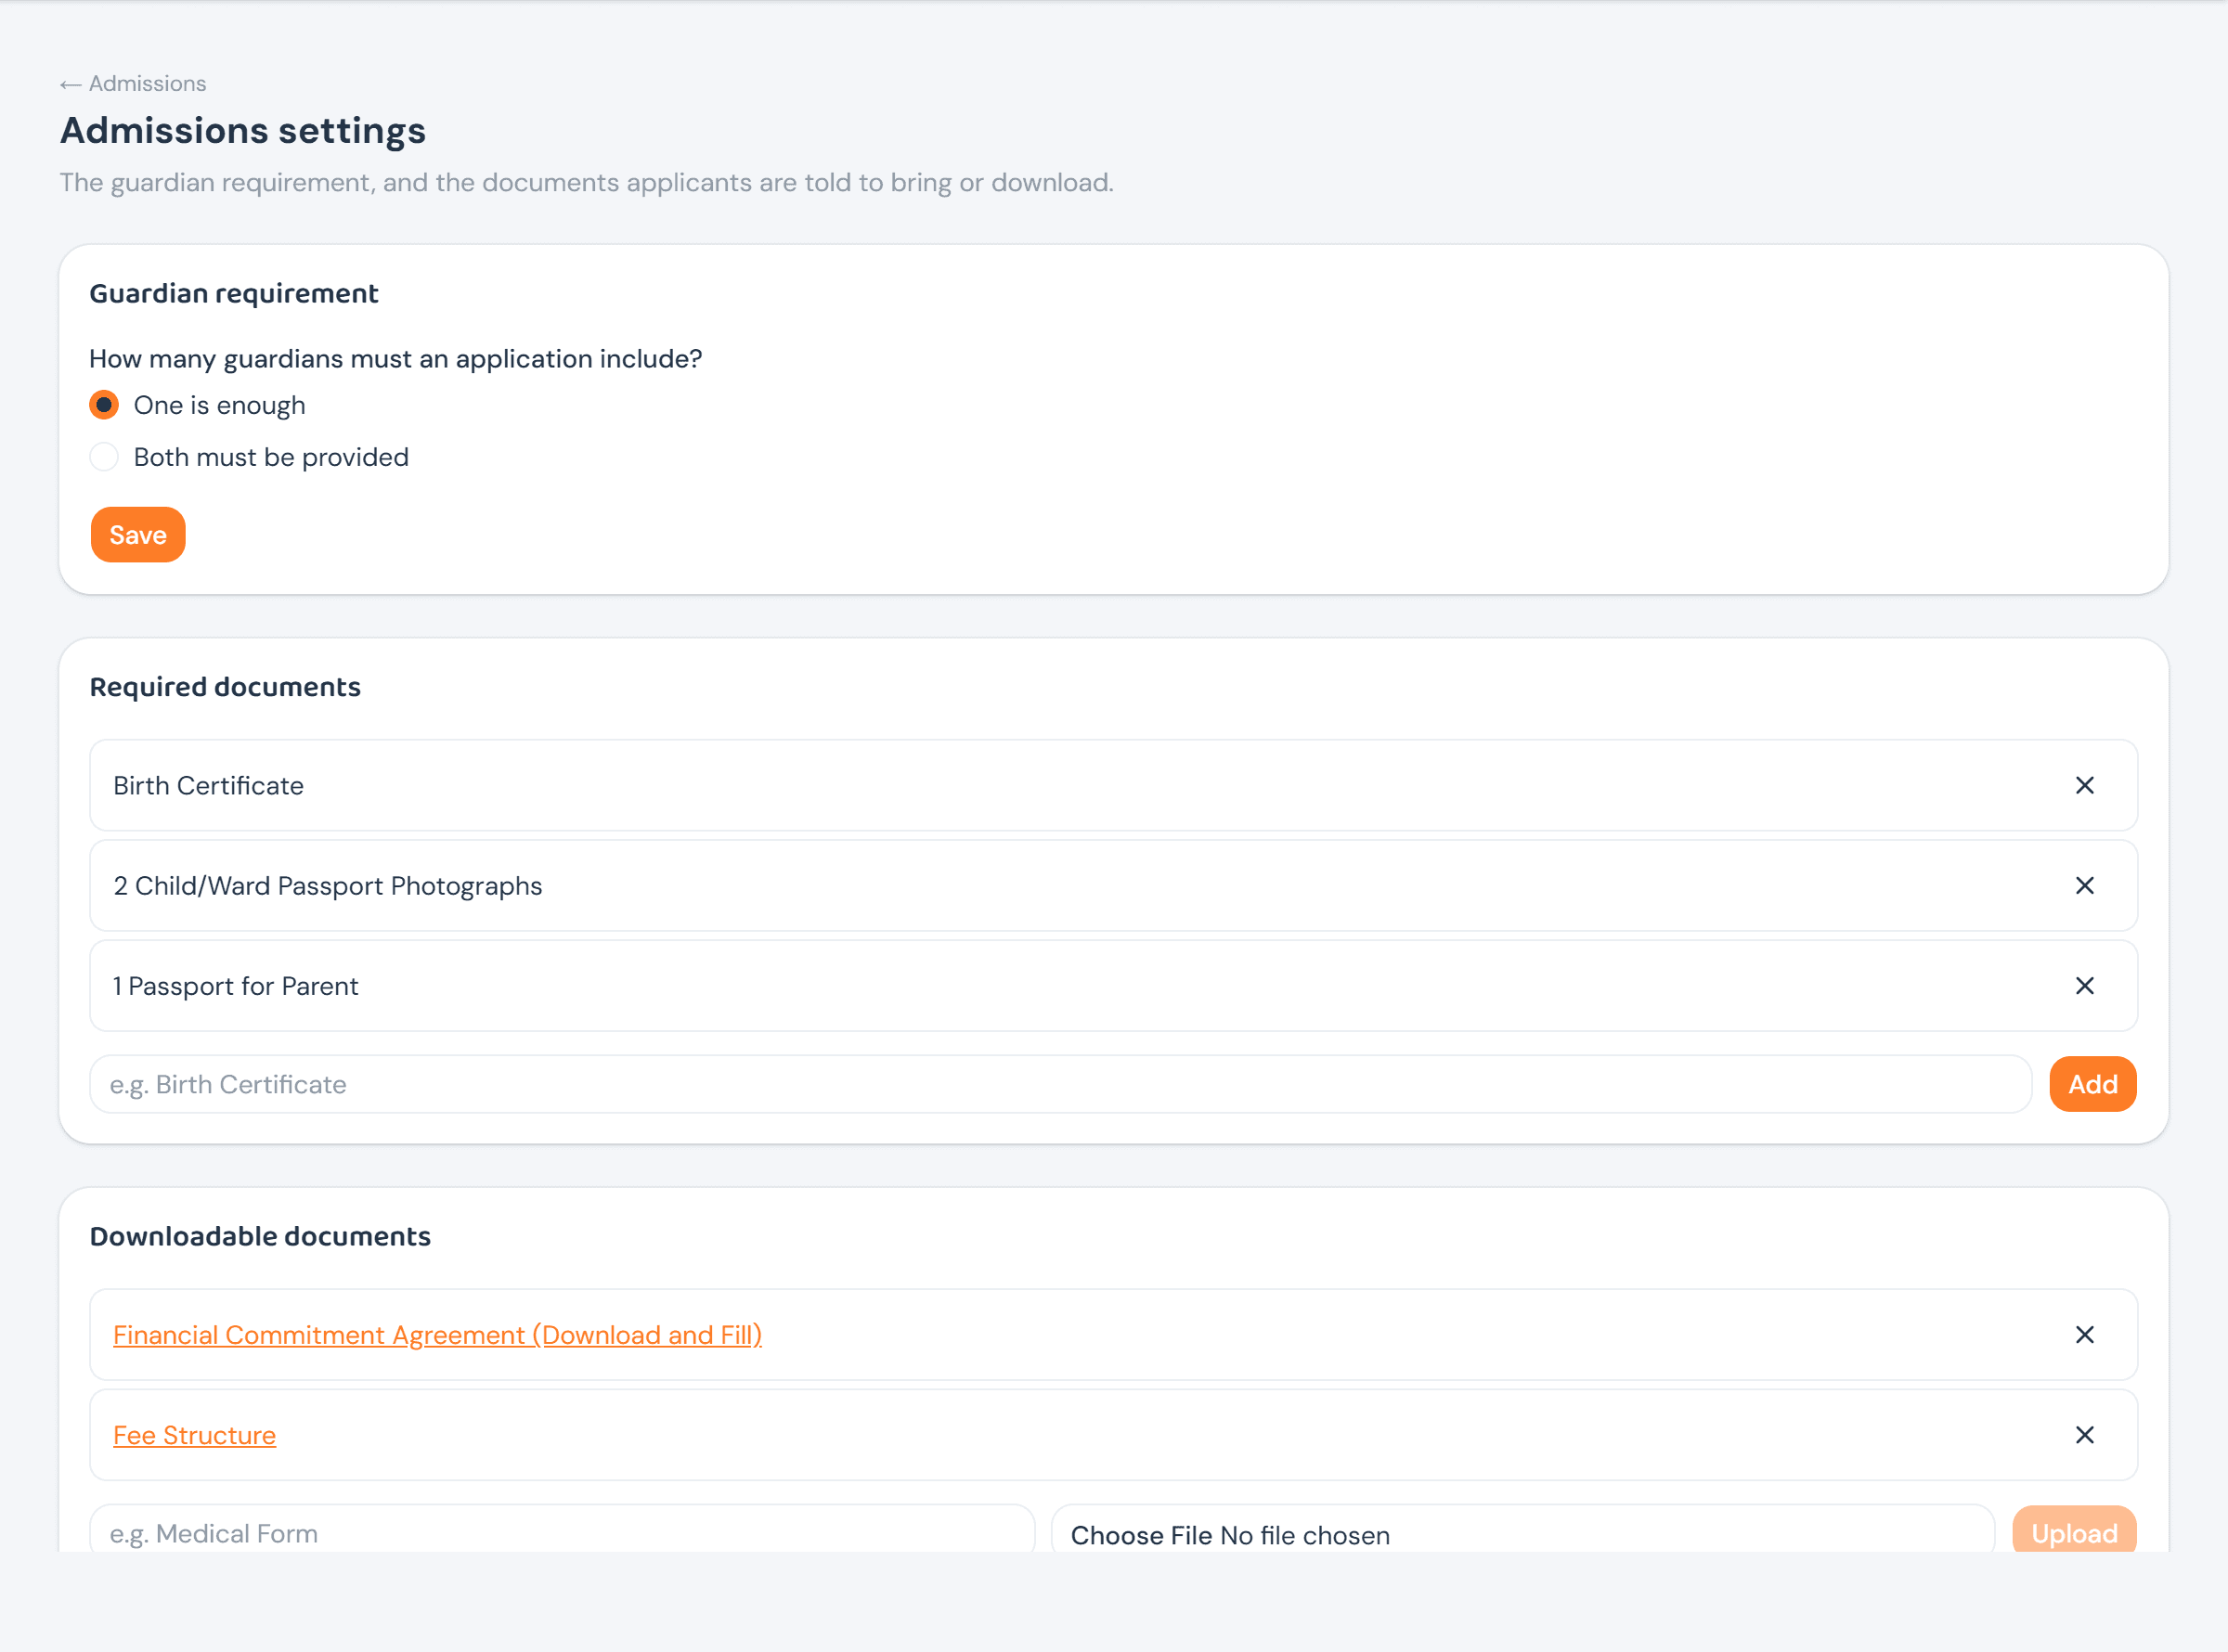
Admissions settings holds the two things that apply to every window: how many guardians an application must name, and the required/downloadable documents list — edited once here rather than re-typed each time a window opens (though a window can override its own document list too).
Applying for a ward
/apply is public — a prospective parent sees whether applications are open and what each open class costs before ever logging in.
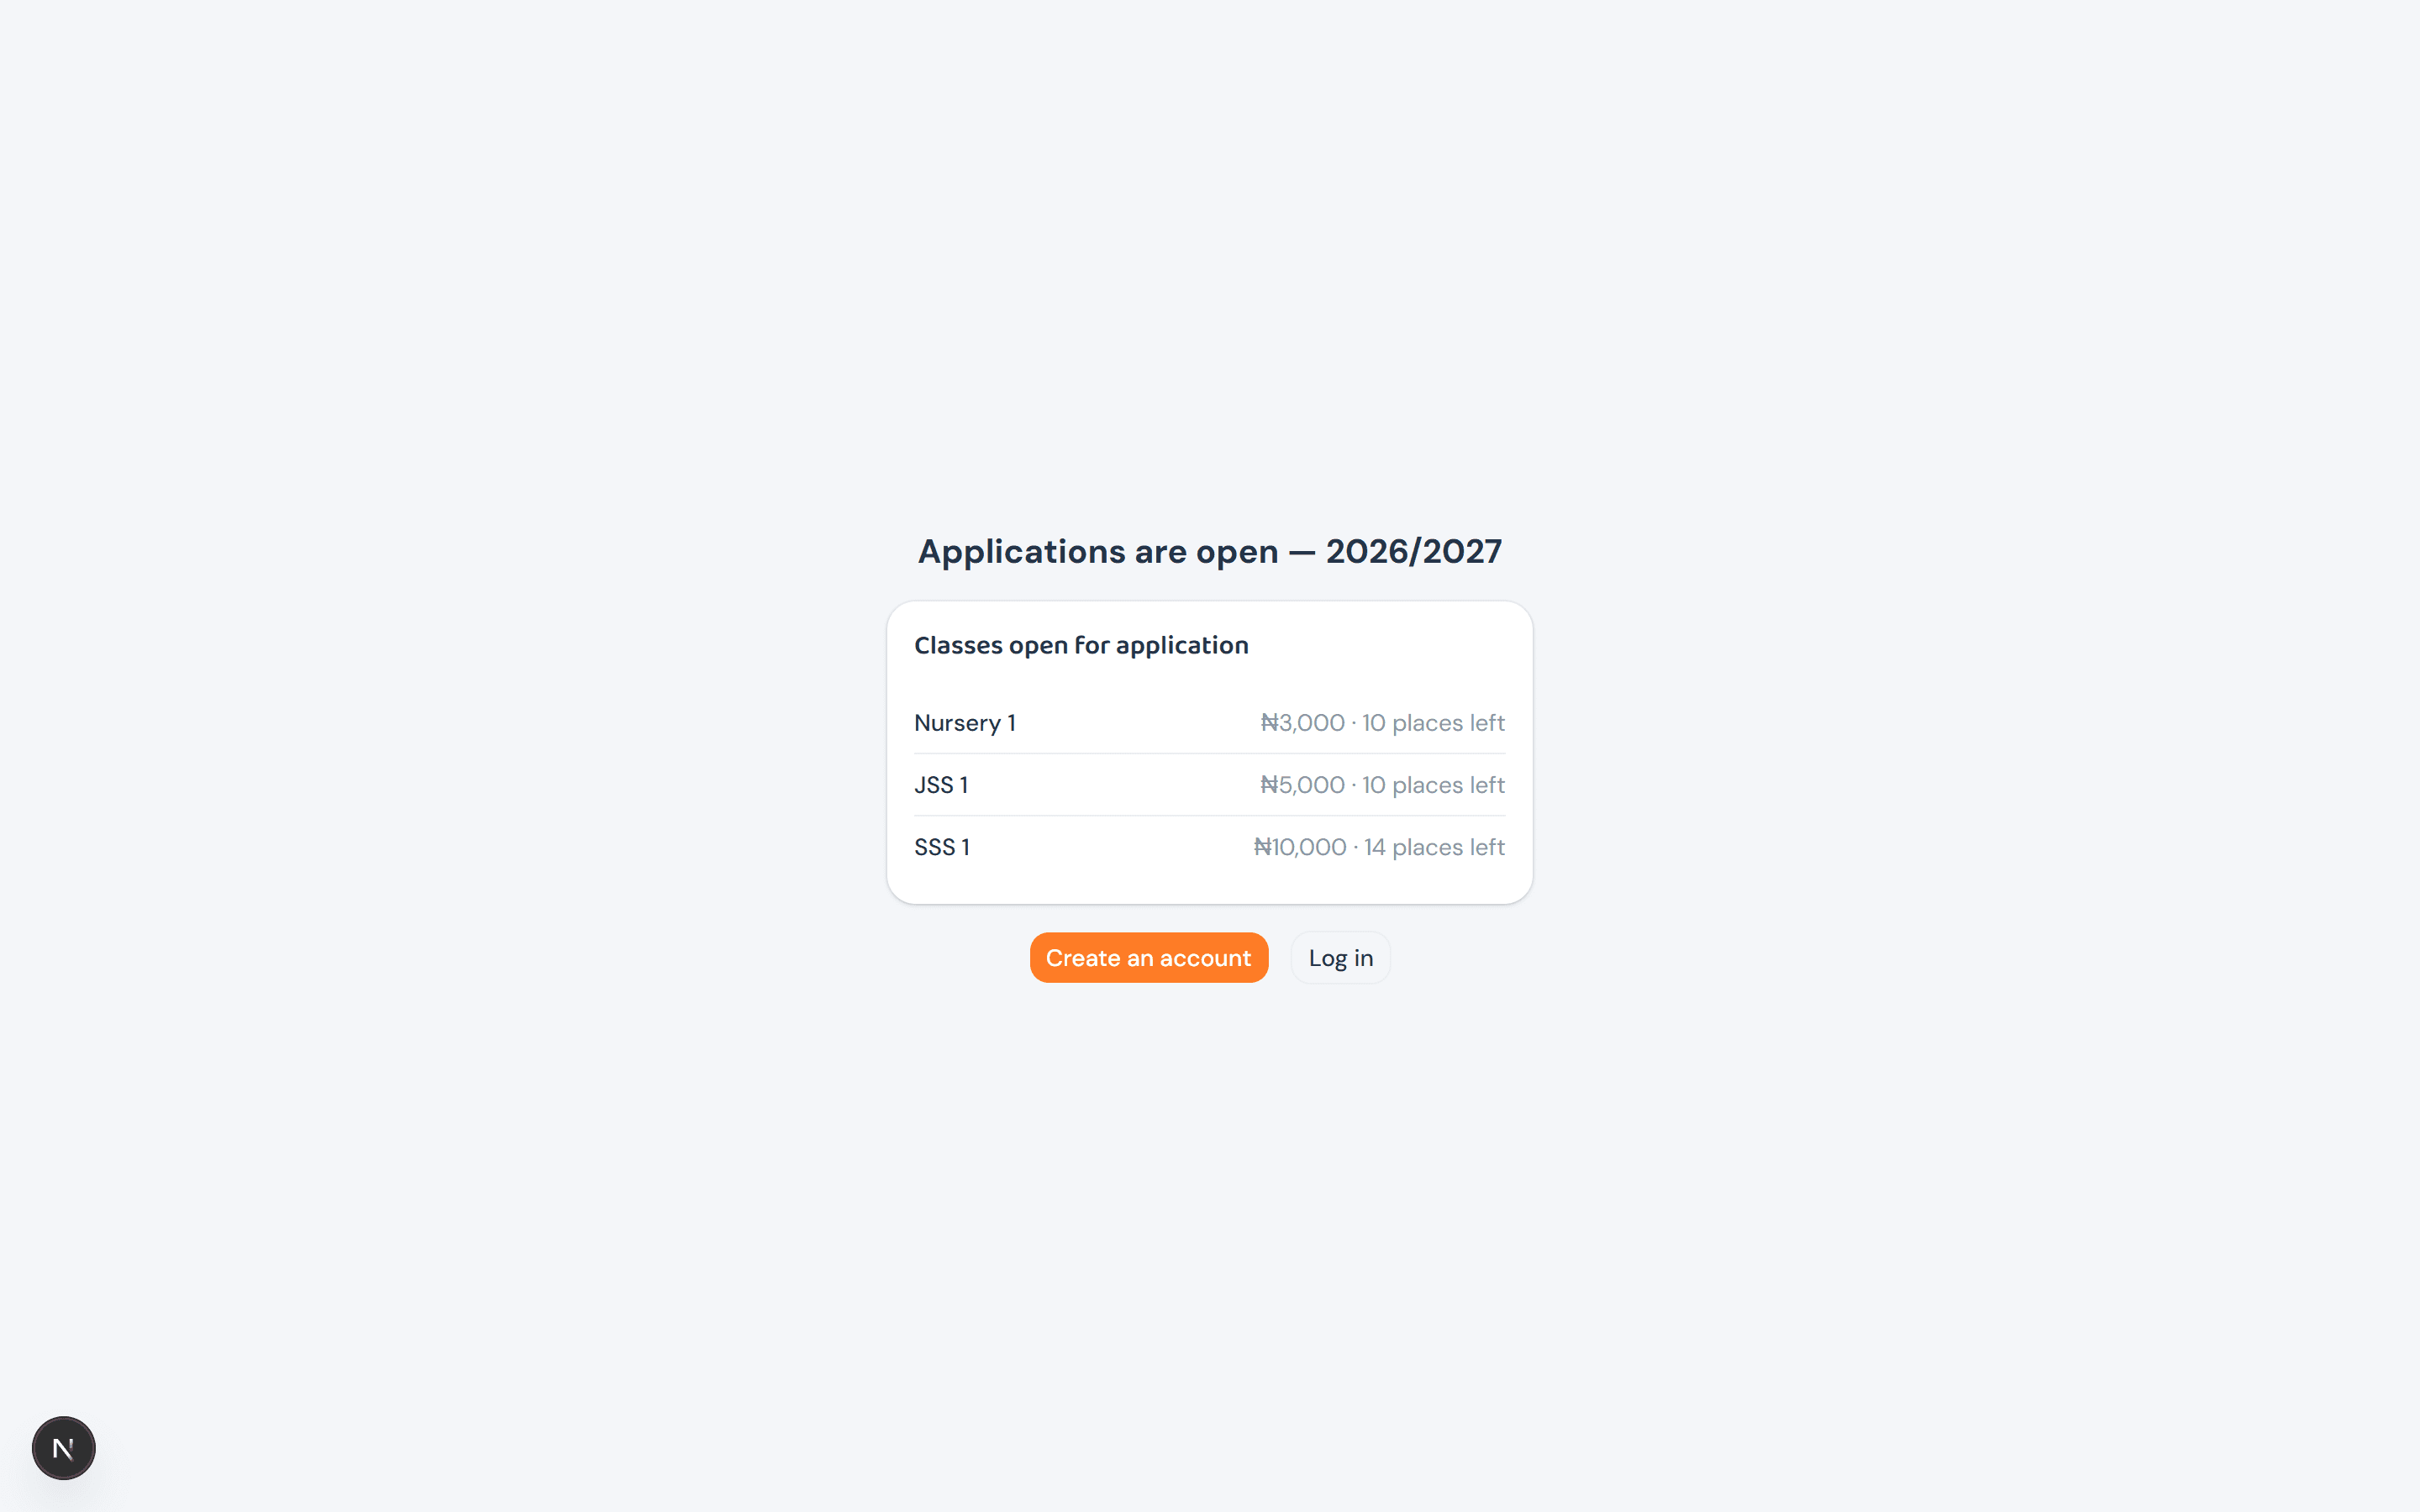
Logging in or registering swaps that card for the actual application form — personal and health details, schools attended, one or two guardians per the settings above, the required-documents checklist, and a declaration. The account holder is always guardian #1; applying for a family with no account of its own is the Head Teacher's separate walk-in flow, not this form. If the chosen class has a fee, the application saves but isn't submitted for review until that fee is paid.
Reviewing & deciding applications
Every application the school has ever received lives on one console, filterable by status, each row carrying whatever action its current status allows. All five real statuses below are showing at once: Approved (arm picker + accept), Needs more info (sent back to the applicant, no reviewer action left to take), Rejected (terminal), Pending (Approve / Ask for more / Reject, right there in the row), and Accepted. An unpaid application fee shows as its own badge alongside the status, since the two are independent — an application can be fully approved and still unpaid.
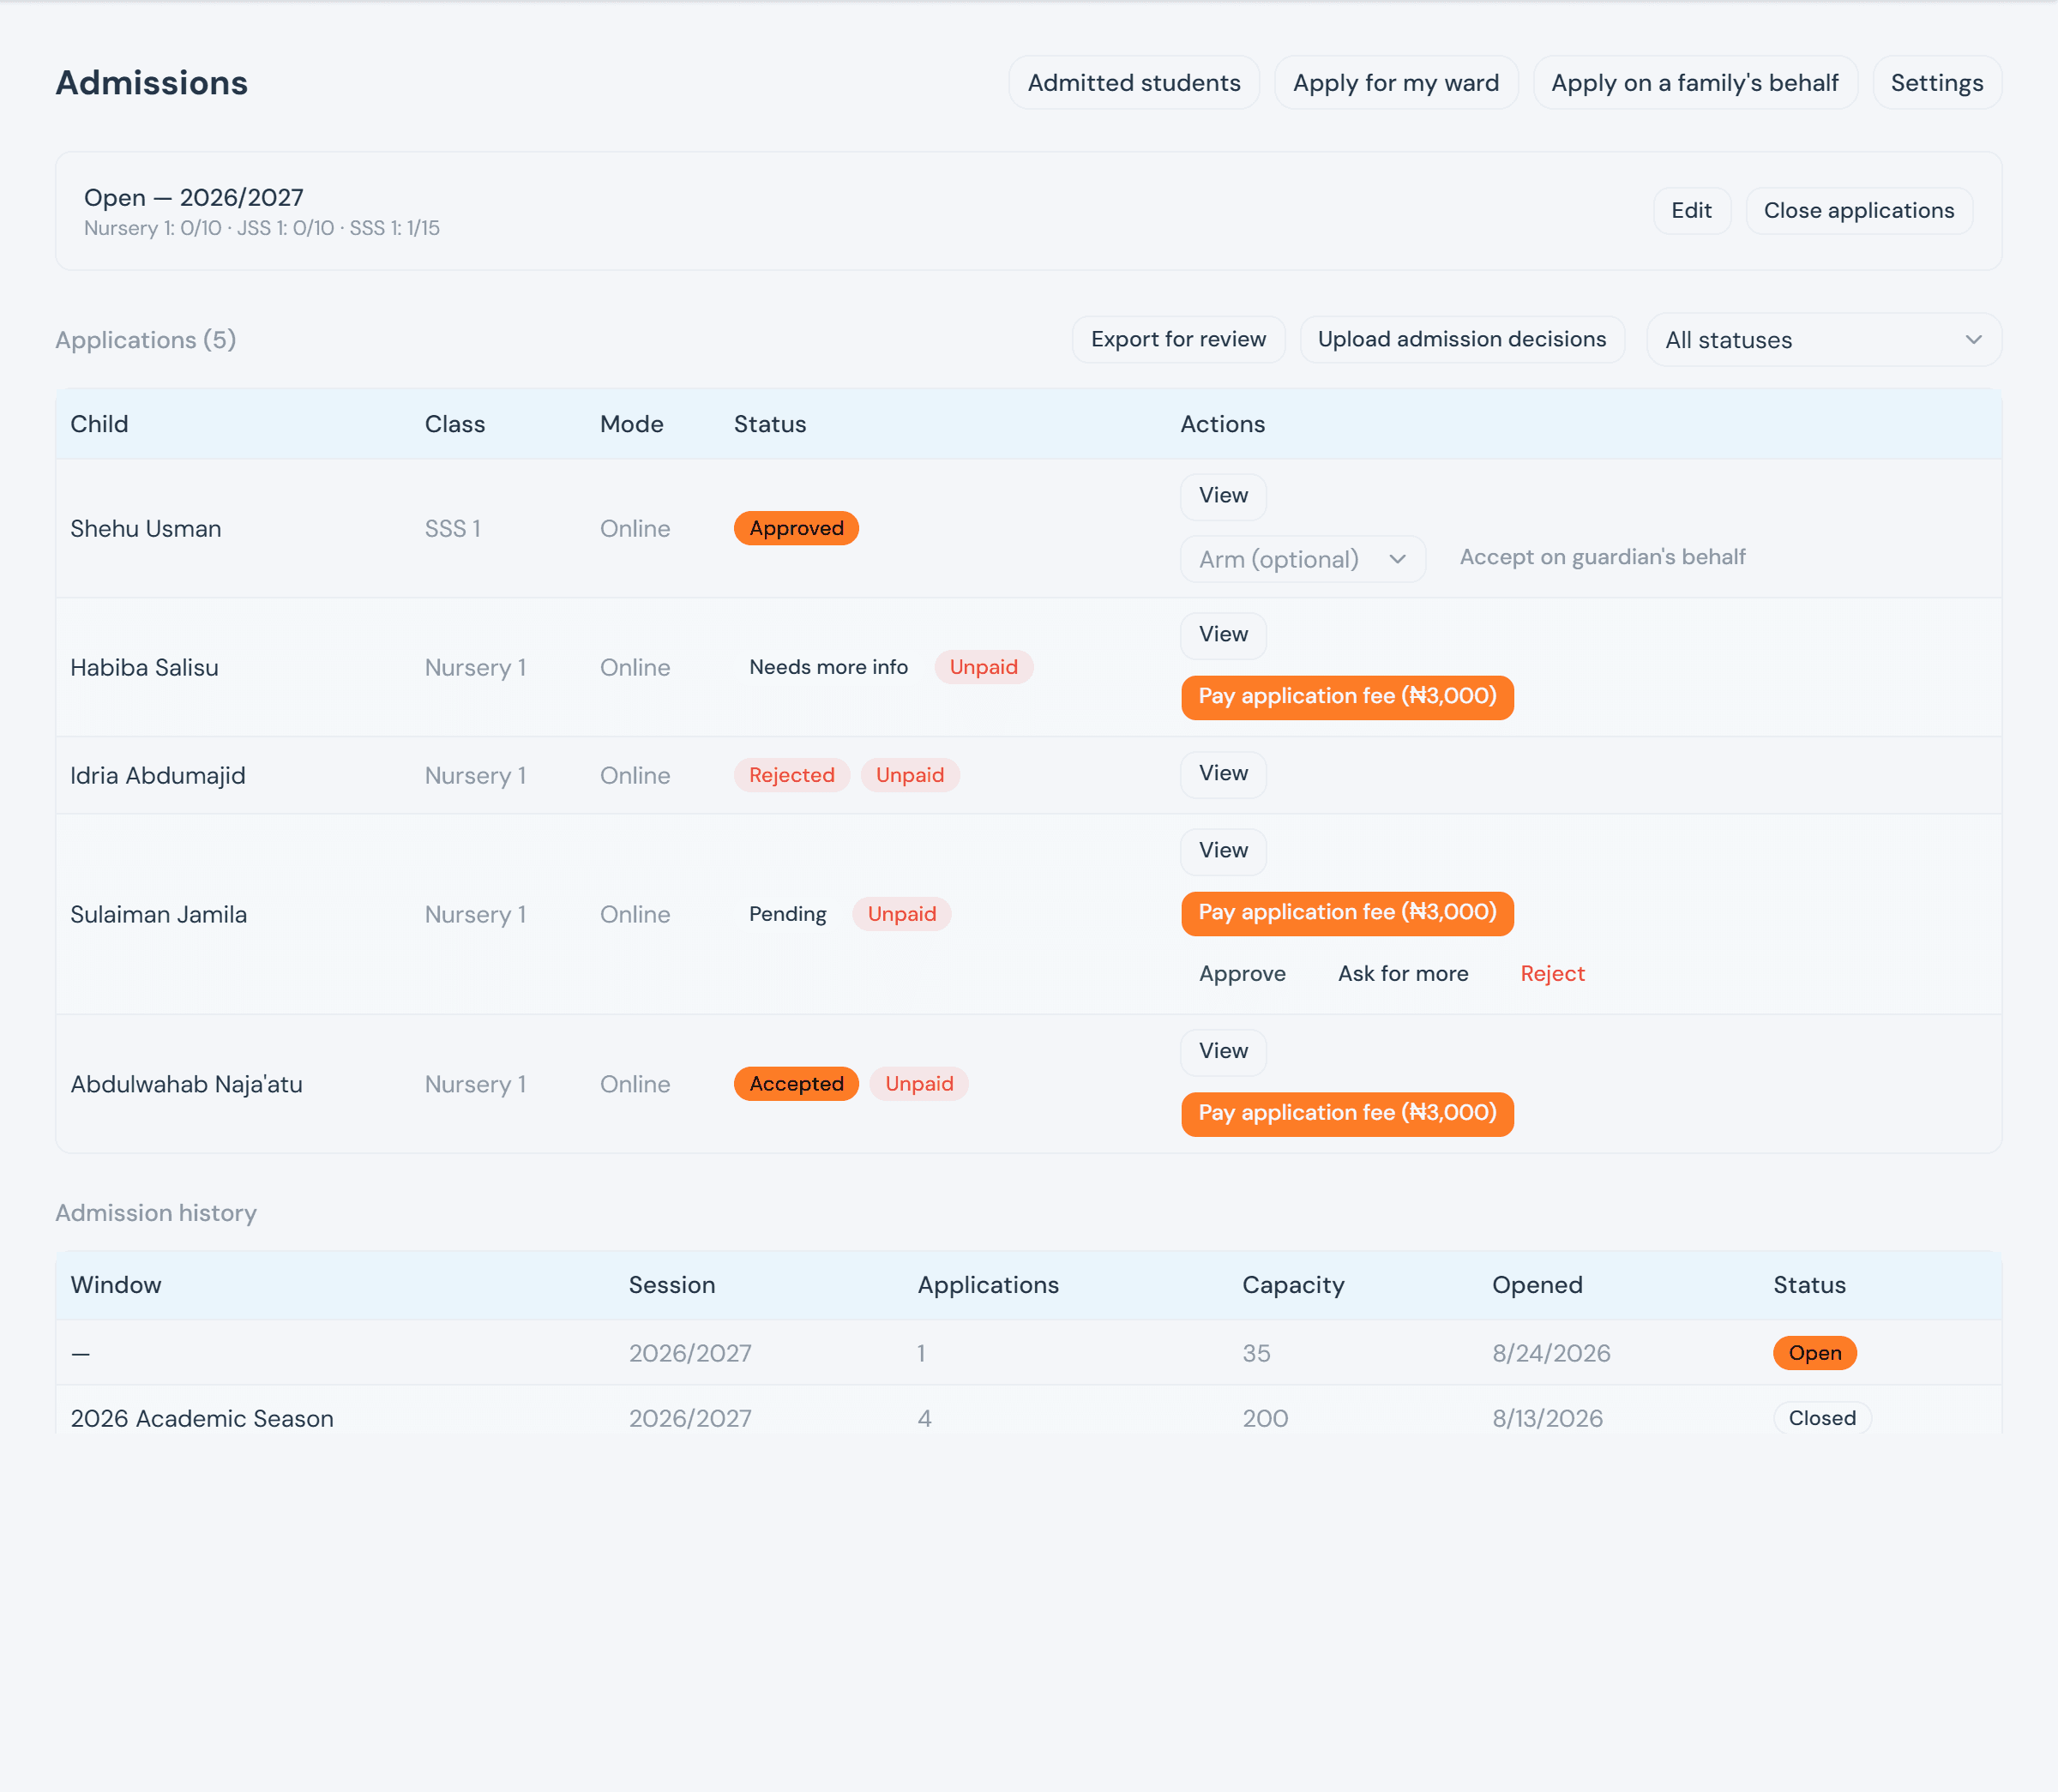
Approve and Reject ask for nothing further; Ask for more takes a short note and flips the application to Needs more info, handing it back to the applicant to edit and resubmit. Once approved, accepting — by the guardian themselves, or by the Head Teacher on their behalf — creates the actual student record via the same admission function a manual entry uses, with the arm left unassigned until the class teacher sorts that out later. Export for review / Upload admission decisions is the same offline bulk-review shape every import in the app follows, for a school that would rather mark decisions in a spreadsheet than click through each one.